What are AWS Cost Allocation Tags?

July 27, 2023
Guides
If you’ve been around the AWS block, you know that understanding your AWS costs has always been a particularly head-scratching exercise. In taking up this gauntlet, you might have enabled AWS Cost and Usage Reports (CUR), which is an excellent and necessary first step. However, on its own, the CUR still can’t help you answer important cost questions such as the following:
How much did it cost to operate the front-end service infrastructure last week?
How much do DynamoDB reads cost the back-end team every day?
These questions involve a specific subset of resources in your account–a level of granularity that the native CUR doesn’t provide. Wouldn’t it be useful, especially in larger companies, to group resources based on specific teams, projects, and org-structures, and determine costs for each?
Cue AWS Cost Allocation Tags – pieces of metadata you can assign to AWS resources. Assigning the same AWS tag to specific resources lets you effectively group them together, which provides a myriad of organizational benefits. However, we’re specifically interested in using them to track costs for different groups, which narrows our focus down to a unique flavor of tags: AWS cost allocation tags.
AWS cost allocation tags can be used in conjunction with the CUR to really help you start gaining serious insights into your AWS spending. So what are they exactly, and how do they work? In this article, we’ll cover the benefits and challenges of using AWS cost allocation tags, and teach you how to best leverage them to understand your costs and usage.
AWS Cost Allocation Tags Types
AWS Cost allocation tags are essentially just regular old AWS tags, but with an additional twist: you must manually activate them before they start showing up in your CUR. Once activated, AWS cost allocation tags appear as additional columns in your AWS CUR under the resourceTags/ namespace. Under this namespace, there are two types of cost allocation tags.
AWS Generated Cost Allocation Tags
Firstly, we have AWS cost allocation tags that are generated by them. These tags are only viewable from the Billing Management console; you won’t see these tags show up anywhere else. Once you enable them, you’ll start seeing new columns in your CUR report and new filters in AWS Cost Explorer.
You can tell a tag is AWS-generated if it contains the aws: prefix. Here are some examples of AWS-Generated tags:
- aws:createdBy: This is the main AWS-generated tag key. Like its name suggests, you can use this key to track the entity that created a particular resource. This key’s value can be one of either account-type:account-Id, access-key:user-name, or the role session name. This tag can only be applied to certain AWS resources: visit the AWS documentation for the full list.
- aws:cloudformation:stack-name: So much of today’s cloud infrastructure is provisioned with an IaC tool like CloudFormation (CFN). For cost tracking purposes, this key allows you to easily track which resources belong to which CFN stacks when analyzing your CUR file. Then, you can determine each stack’s cost by, say, checking against the resourceTags/aws:cloudformation:stack-name column in a SQL query.
There are a few other AWS-generated cost allocation tags, but these two are probably the ones you’ll use the most. Note that AWS-generated tags are meant to be easy to just enable and use; they cannot be customized, as key names and values are automatically assigned.
User-Defined AWS Cost Allocation Tags
Now for the more interesting bit: user-defined cost allocation tags. These allow you to tag your AWS resources any way you want, specifying both the key and the value. After you activate these tags as cost allocation tags in the AWS Billing console, they’ll start appearing in your CUR report.
User-defined cost allocation tags are extremely powerful, because you can tag your resources based on what kind of cost analysis you want. For example, if you want to figure out how much your front-end team (codenamed “Squirtle”) is spending on infrastructure, you could tag all their resources with a user-defined tag Squirtle. Then, after activating Squirtle as a cost allocation tag, your CUR files would include resourceTags/user:Squirtle as a separate column.
How to Enable AWS Cost Allocation Tags
Now, let’s walk through two examples of enabling cost allocation tags, and see how this modifies our CUR reports.
Enabling AWS-Generated Cost Allocation Tags
This one’s extremely simple. Navigate to the AWS Billing console, select Cost allocation tags in the left menu, and select the AWS generated cost allocation tags tab:

Here, you’ll see a list of all currently available tags. Choose the ones you want to activate, and click on the Activate button at the top right. Immediately, the console should reflect the newly activated tags:

You’re all set! The next time you receive your CUR, check to see that it contains new columns
such as resourceTags/aws:createdBy. Moreover, if the resource in that line item was created after activating the tag, you should see a value for it as well. Here’s what a sample CUR entry might look like, leaving only the more important columns:

For this line item, notice that the resourceTags/aws:createdBy contains a value describing the entity that created the resource. In this case, it contains an access key ID combined with the user name.
Enabling User-Defined Cost Allocation Tags
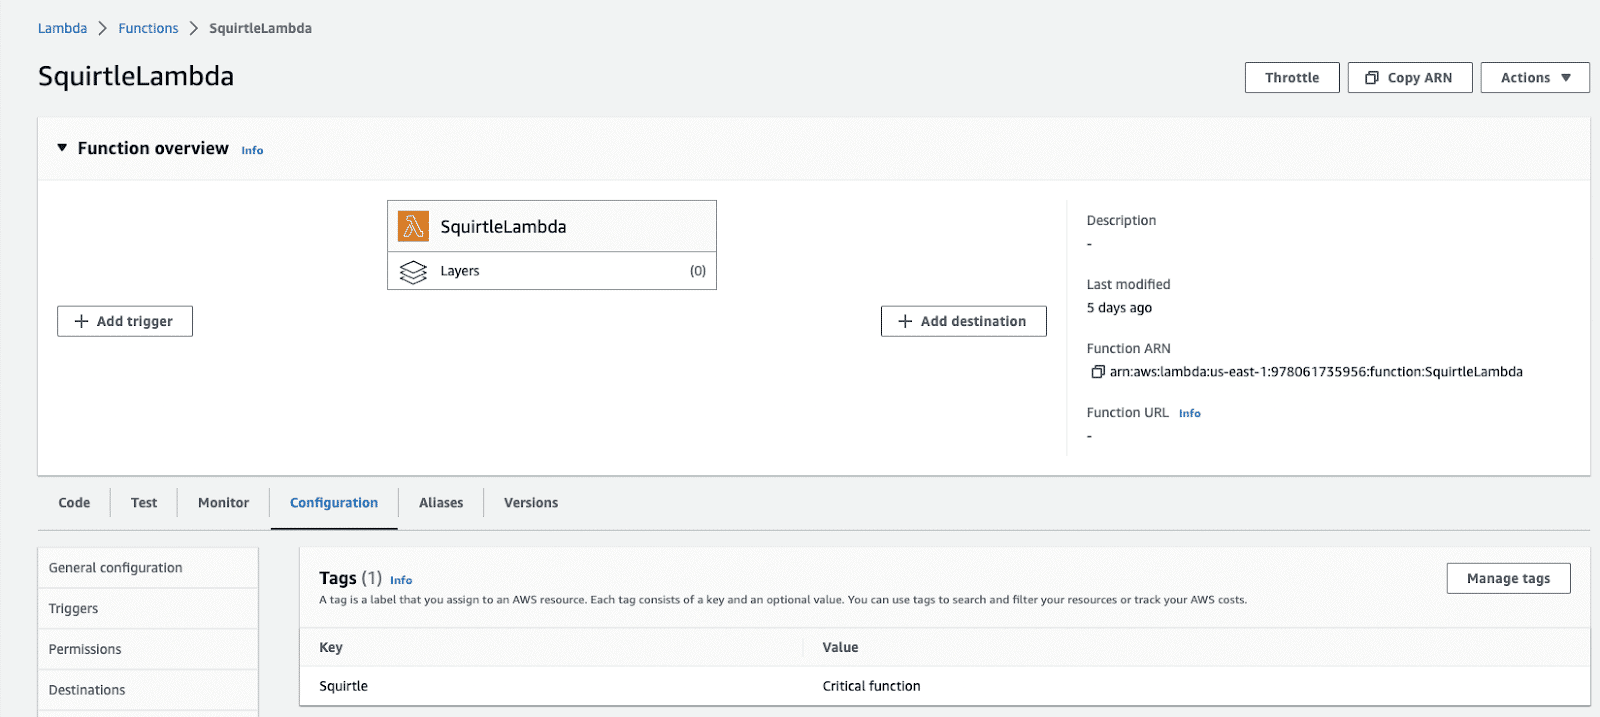
This one’s a little more involved, but still very simple. First, you’ll have to tag your resource. Suppose that our front-end Squirtle team owns a Lambda function that’s critical to their operations. Let’s properly tag it so we can track its costs. We can do this directly from the Lambda console:
Alternatively, if we had a bunch of resources we wanted to tag at the same time, using the AWS Tag Editor would be more efficient.
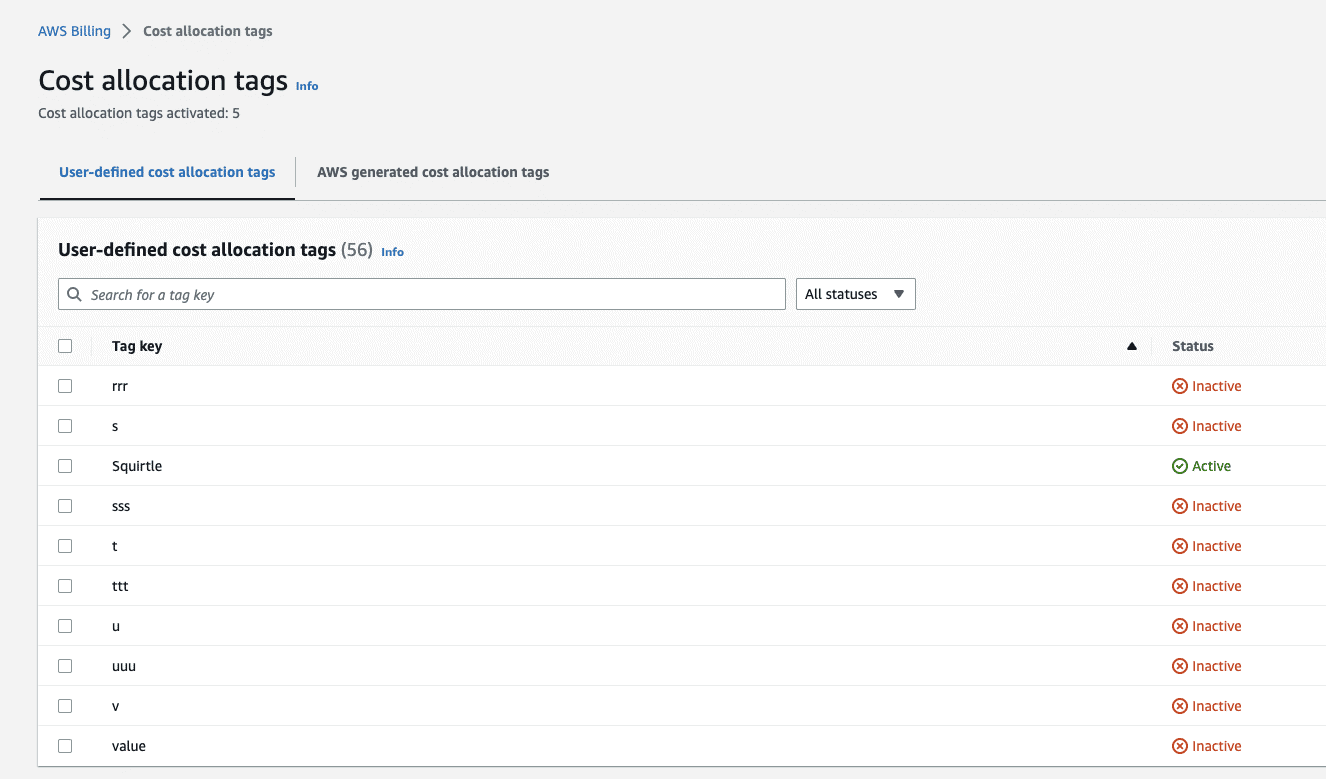
Next, let’s move over to the AWS Billing console and find our tag. This time, we need to look under User-defined cost allocation tags. Locate your tag, and activate it:
Note that if you’re creating an entirely new tag key from scratch, it can take some time for it to show up in the Billing console. Our experiments showed that it usually takes a few hours.
Once again, now you’re all set. The next time you receive your CUR, check to see that it contains the resourceTags/user:Squirtle column. Moreover, because we also assigned the SquirtleLambda function a value of “Critical function” for this tag, that should show up in the CUR too. Here’s what a sample CUR entry might look like:

To unleash the full power of the Squirtle tag, we can use an AWS CUR integration with Athena, Quicksight, or Redshift to analyze the cost of operating all of the front-end Squirtle team’s critical functions. For example, we can modify this SQL query from AWS Well-Architectured Labs to give us costs that pertain only to resources tagged with the Squirtle key and ‘Critical function’ value:
SELECT

  line_item_product_code,

  line_item_line_item_description,

  SUM(line_item_unblended_cost) AS sum_line_item_unblended_cost

FROM

  ${table_name}

WHERE

  ${date_filter}

  AND line_item_line_item_type NOT IN ('Tax','Refund','Credit')

  AND resource_tags_user_Squirtle = 'Critical function'

GROUP BY

  line_item_product_code,

  line_item_line_item_description

ORDER BY

  sum_line_item_unblended_cost DESC;
This is just the start: there are a million directions we can take this! For example, we could come up with additional values for the Squirtle key to further break down the front-end Squirtle team’s costs if we wanted.
Best Practices for Using AWS Cost Allocation Tags
While cost allocation tags are great, don’t just jump straight in and enable every tag you can get your hands on. Here are some best practices to watch out for when using them.
Scope Out Tag Requirements
Because cost allocation tags ultimately show up in your CUR file, you should spend some time thinking through tag requirements and coming up with a design. What tag naming conventions should you use? How extensible is your tagging system in case your team scales up in the future? How can you ensure your organization strictly adheres to your tag conventions?
It’s really important to get tagging right from the onset, as it can be difficult to modify later.
To make sure you start off on the right foot, we recommend reviewing our guide, AWS Tagging best practices.
Keep Tags Lightweight
Just because you can turn every user-defined tag into a cost allocation tag doesn’t mean you should. One of the main consequences of enabling a cost allocation tag is that it adds a column to your CUR file, which can substantially increase its size. The CUR file is already big enough as-is, so it’s best to only enable tags that you absolutely need. Keeping your tagging strategy lightweight can prevent unnecessary “CUR bloating”.
Tag Immediately After Enabling CUR
In general, we recommend that new AWS users enable their CUR as soon as possible, because AWS doesn’t backfill old spending data. Well, it’s the same story for tags. AWS won’t start tracking spending data related to your cost allocation tags until after you’ve enabled them.
The overall takeaway here is to figure out your (lightweight) tagging strategy early, and then implement it as soon as possible.
Challenges With Using AWS Cost Allocation Tags
Using cost allocation tags comes with its own set of challenges. Being aware of them is important in helping you make the most of tags.
You Must Tag ASAP!
Like we discussed earlier, AWS never backfills spending data. It bears repeating that you should enable tags as soon as possible.
Tedious Tagging
Tagging can be a very manual and tedious process. After all, whenever you create new resources, you’ll have to consider the extra step of making sure it’s tagged properly for cost allocation purposes.
If you use a tool like CFN, this issue is somewhat mitigated. Good code review practices can help your teams ensure that you include all necessary tags in your CFN template before publishing infrastructure changes.
Organization Scaling
As your organization grows, so does the number of AWS resources you’ll have to manage. Making sure they’re all properly tagged is one issue, but you may also have to periodically rethink your tagging strategy. It can be a good idea to audit your tags every once in a while and consider rehauling your previous system if necessary.
Conclusion
Finally, we’re able to address the questions we sought out to answer at the beginning of the article. By using cost allocation tags, we can determine the cost of operating any subset of resources in your AWS account. This, combined with the CUR and a tool like Athena can help you understand your costs so much better.
Of course, while cost allocation tags are powerful, they come with a set of best practices and challenges that you should be fully aware of. It may take some time to design the right tagging strategy for your organization, but it’ll be well worth the investment.
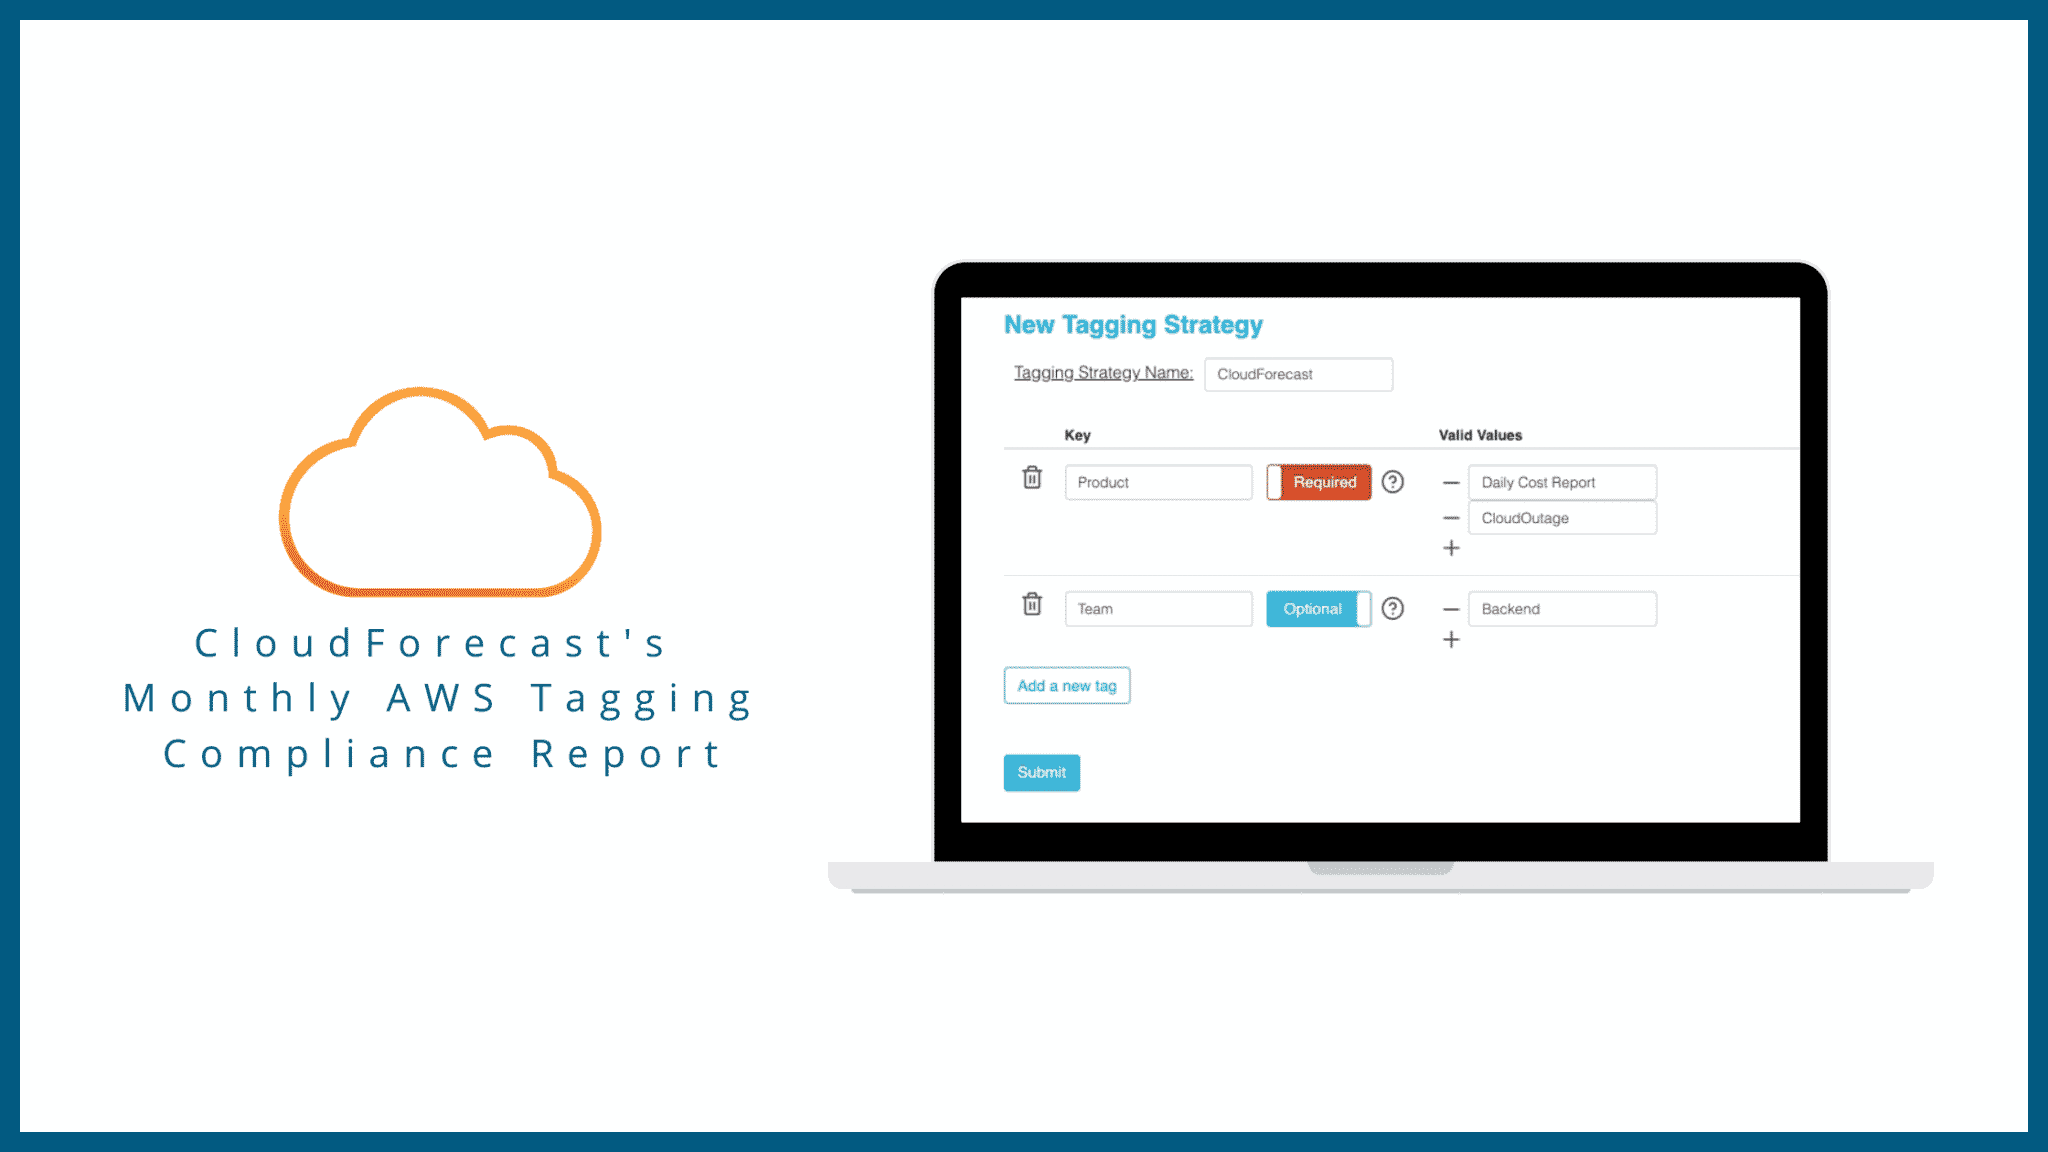
If you want to understand your complex tagging situation without having to wrangle with the CUR, you might also consider CloudForecast’s Tagging Compliance Report. This report offers the following features to help you optimize your tagging situation:
- The Tagging Compliance % based on your tagging strategy
- A rundown of all the resources that are untaggable
- A summary of all improperly tagged resources, sorted by costs
- Discovery of possible typos with your tags
You can read more about our Tagging Compliance Report in this blog post: “CloudForecast’s AWS Tagging Compliance Report”.
Alexander Yu
Alexander Yu is a technical writer at AWS by day and a freelance writer by night. After completing his BS in electrical engineering and computer science from UC Berkeley, he became a software developer at AWS for almost three years before transitioning into technical writing. He lives in Seattle with his dog Yuna.
Blog
More from CloudForecast


Cloud Cost Management is Easy With CloudForecast
We would love to learn more about the problems you are facing around AWS and Azure cost. Connect with us directly and we’ll schedule a time to chat!
Start Free Trial