Terraform Kubernetes Configuration Guide

Last updated 21 Jun, 2023
6 mins read
Infrastructure as Code is a concept that’s quickly overtaking the manual setup of system environments, replacing the blindfolded task of resource allocation with a declared state variables list. Terraform is a platform that provides a command-line interface to manage and scale environments using IaC.
As you can imagine, much of the IaC’s exposure is within the Kubernetes (K8s) orchestrated environments. Kubernetes is a scheduling system for deploying applications across a distributed network of containers that sometimes “contain” different environments for the various services that make up an application.
Since Kubernetes itself is a core element in managing the resulting environments (orchestration), pairing it with Terraform reduces any drifts—subtle environment changes as systems evolve—when either creating new environments or replicating the ones you find conducive for your application’s performance.
In this guide, you’ll discover a simple K8s cluster configuration using Terraform, as well as a few key configuration options for Terraform with Kubernetes including a walkthrough of the process.
⚓️ Check out our other Kubernetes guides:
- cAdvisor and Kubernetes Monitoring Guide
- ECS vs EKS vs EC2 on AWS: Where Should You Deploy Your Containers?
- Kubernetes Cost Management and Analysis Guide
- Using kube2iam for IAM Access in Kubernetes
- Node Exporter and Kubernetes Guide
- Using Terraform to Deploy to EKS
Terraform Kubernetes Configuration Options
First, to help you better grasp the concepts holistically, here are some definitions and explanations of configuration files you’ll soon encounter.
Terraform uses HashiCorp Configuration Language (HCL) as the declarative syntax outline for all state variables in IaC files.
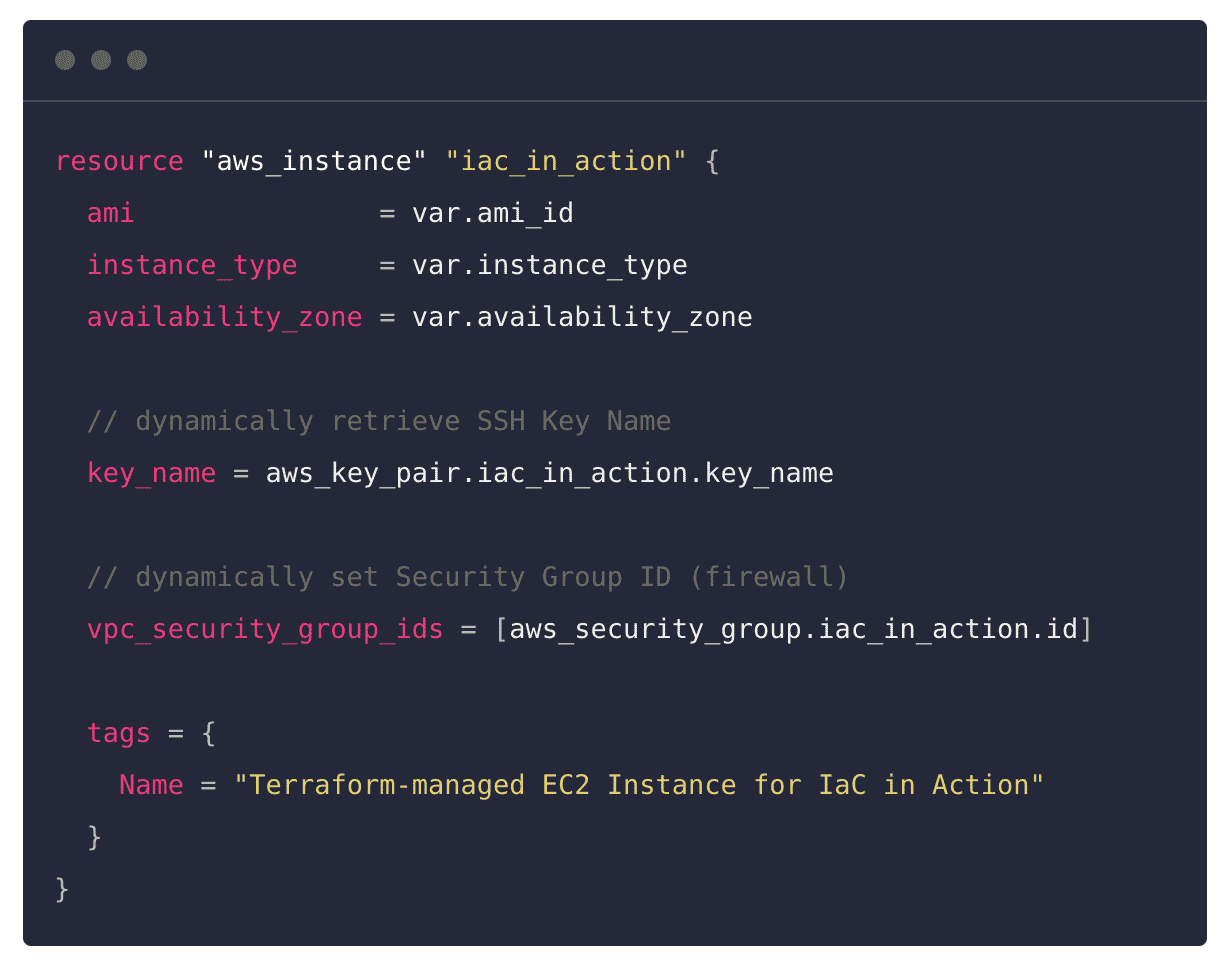
From the sample configuration file above (saved with .tf or .tf.json extension), you’ll want to pay particular attention to the following elements:
A block. The example contains a single resource block named “aws_instance” which is then briefly described by the “iac_in_action” label. Every block is equivalent to a method, and contains static declarations of environment variables as arguments.
Arguments. The example above contains a few arguments. You can quickly pick out arguments by noticing the assignment operator ( “=” ) that appears each time a value is assigned to a state identifier. As you experiment with creating arguments in IaC files, a few argument types will become apparent:
- The type argument sets in stone the kind of values inside a block of arguments. An example would be bool for a dual-state variable or string for variable-character-defined values.
- The description argument is a short string that explains the content of a block for documentation purposes. Why not use comments? Well, the captured string appears in dashboards, whereas comments help on the config-edit side of IaC.
- The validation arguments often come in the form of a nested block inside the resource block. They declare rules and even assign tags to the resources in your IaC.
These terms are consistent across all the cloud services providers with which you can use Terraform. However, when it comes to Kubernetes, there are different sets of configurations depending on your cloud services provider (GKE, AKS, EKS), though, even then, the configuration logic flow is similar.
Kubernetes Specific Configuration Options
In this section, you’ll be using Terraform’s Git resource including a quickstart for AWS EKS . The provider setup phase of a terraform block consists of specifications of minimum versions and provider declarations, which then flow into the intended K8s environment settings sections.
For this Amazon EKS example, you’ll have to pass AWS as the service provider along with its region and any availability zones, should you want to segment by zone. A blank zone specification assumes full inclusion.
1 2 3 4 5 6 7 |
terraform {
  required_version = ">= 0.12"
}
provider "aws" {
  region = var.aws_region
}
data "aws_availability_zones" "available" {}
|
As you can imagine, access to the actual K8s cluster will not be openly allowed. As such, the provider will need to specify the location of the K8s config file:
1 2 3 |
provider "kubernetes" {
  config_path = "~/.kube/config"
}
|
Different cloud services providers adopt varying authentication configuration options. For example, Azure applies a default certificate policy. When declaring the K8s provider, you’ll need to need to call variables against the authentication arguments in this syntax:
1 2 3 4 5 6 |
provider "kubernetes" {
  host = "${the pointer to the host key}"
  client_certificate = "${encoding_format(pointer to the certificate)}"
  client_key = "${encoding_format(client key pointer)}"
  cluster_ca_certificate = "${obfiscation_format(pointer to the certificate)}"
}
|
Google, on the other hand, relies on an ephemeral token provision service for authenticating any third-party service to its Google Kubernetes Engine platform as the default configuration option. This way, any connections your IaC sessions initiate have a timeframe of activity, after which a fresh token should be obtained. On the .ft file, the implementation file looks like this:
1 2 3 4 5 |
provider "kubernetes" {
  host   = "https://${data.google_container_cluster.my_cluster.endpoint}"
  token  = data.google_client_config.default.access_token
  cluster_ca_certificate = obfiscation_format(pointer to your certificate)
}
|
Each of these cloud services (GKE, AKS, or EKS) requires that you follow a specific documentation path to implement Terraform on them. For simplicity’s sake, forthcoming configurations in this guide will focus on the AWS platform.
Create a Kubernetes Cluster Using Terraform on Amazon EC2
Before you get started, make sure you have access to the following resources as prerequisites. (Note that the instructions below apply for MacOS, but you can follow Terraform documentation for your exact OS and package manager pair.)
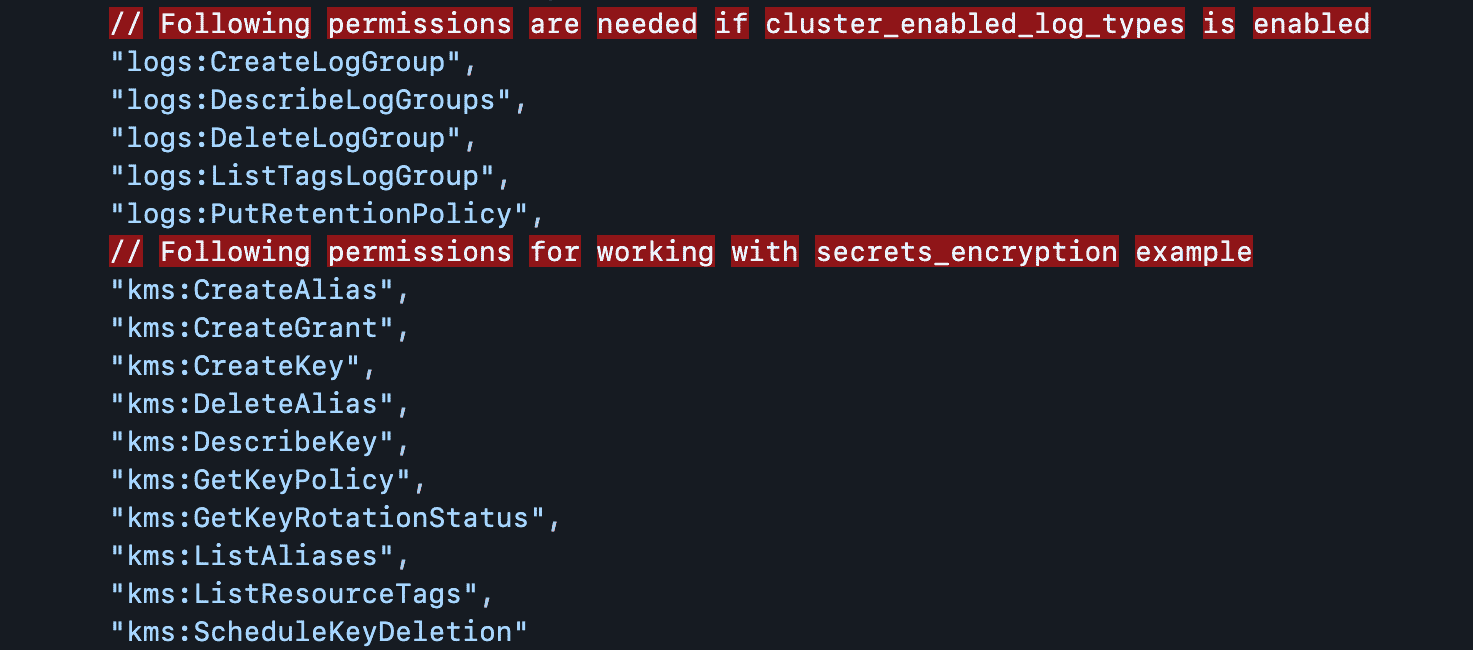
- An AWS account along with a command-line interface (AWS CLI) and the following IAM permissions and authenticator :
For the CLI, you can get started by running the simple $brew install awscli command. Then initiate authentication into your EC2 instance. For that, simply run aws configure and have your access key, secret, the default instance region, and desired output format information ready.
- To install the IAM authenticator, simply execute the
$[package manager] install aws-iam-authenticatorin your terminal. You’ll have to replace the [package manager] placeholder above depending on your OS and preferred package manager . - Repeat the process in #2 above for kubectl _and _wget with these commands respectively:
$[package manager] install kubernetes-cliand$[package manager] install wget.
Once these prerequisites are out of the way, you can start setting up a Terraform workspace. This sample repository will help you learn Terraform beyond what the scope of this post can cover. The .tf files contained in the root of this Git repo have arguments that you should check using the knowledge so far obtained in this article. Clone this repository and $cd into the main folder:
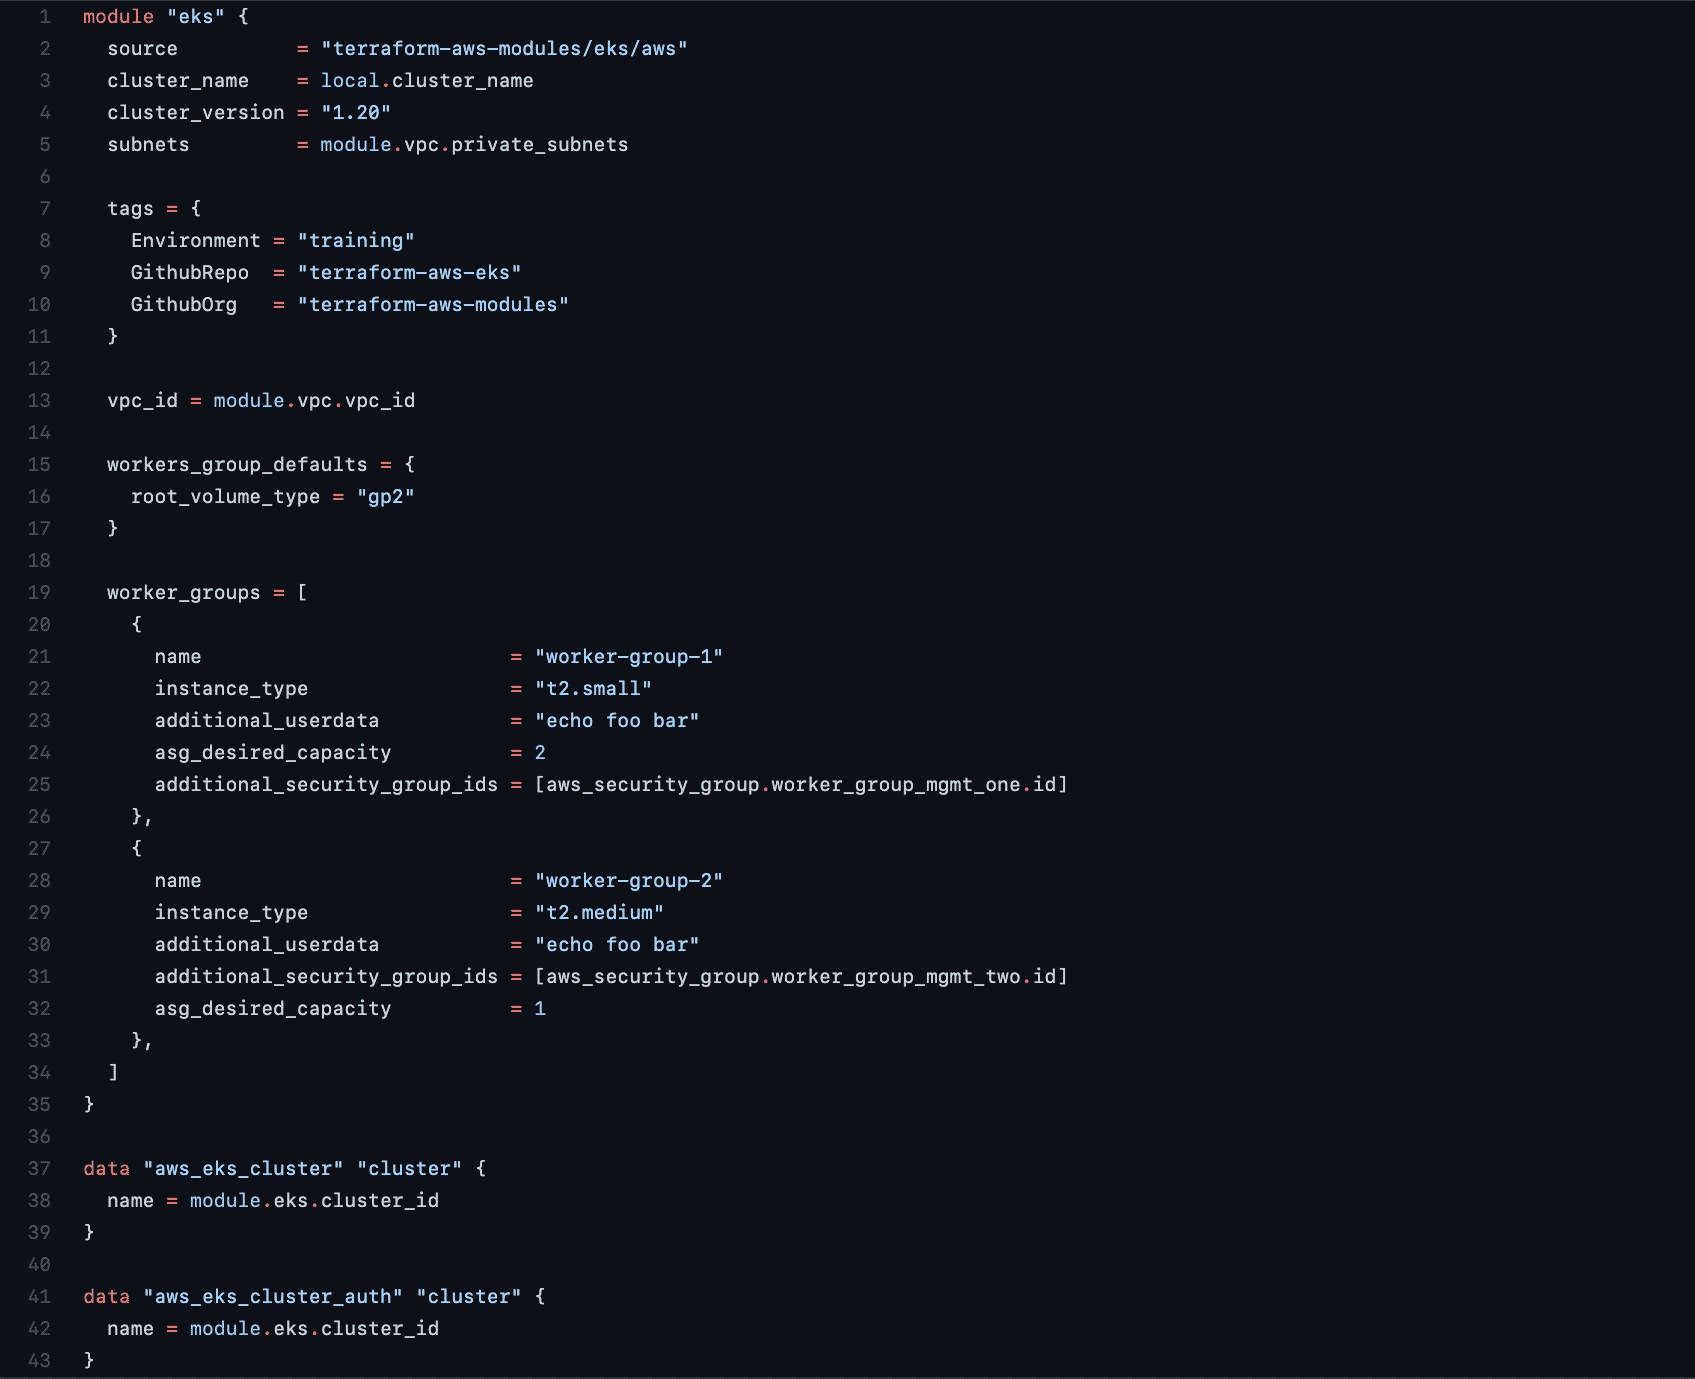
Of interest is the eks-cluster.tf , which sets tags specific to the environment and the source control location names where you’ll find the config files and any other dependencies at a later stage. This is also the configuration file in which the number of worker groups and nodes are declared.
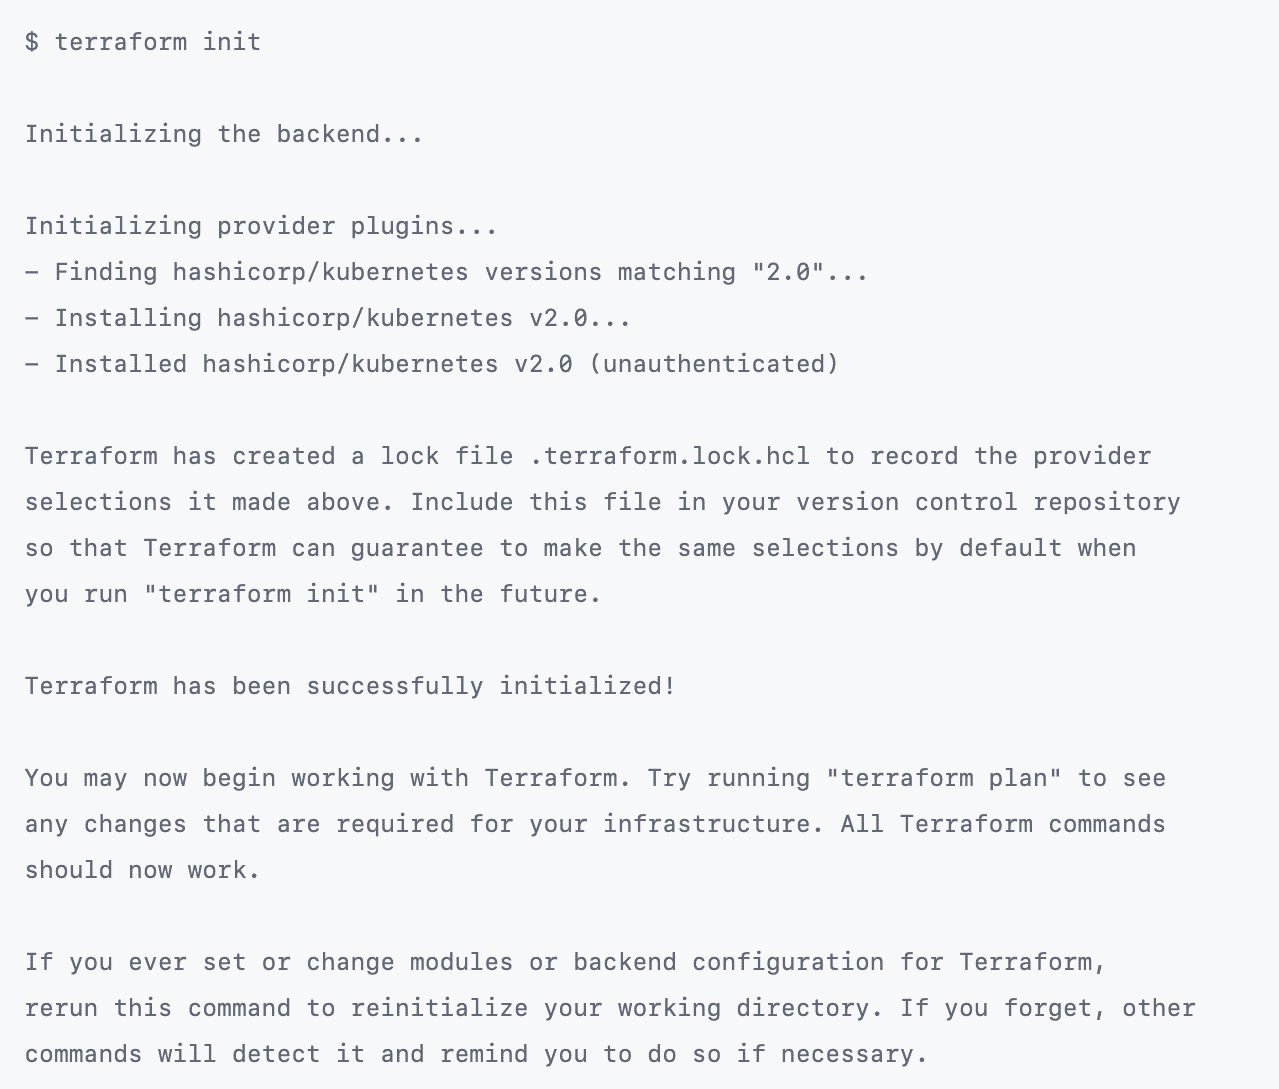
Run $terraform init against your AWS instance to begin the Terraform environment setup, after which you should prepare the provisioning of a fresh EKS cluster by running $terraform apply.
At this stage, you will have sparked the Terraform Plan service, which shows the possible resources available for provision in line with the arguments in each of the .tf files now stored in an S3 bucket.
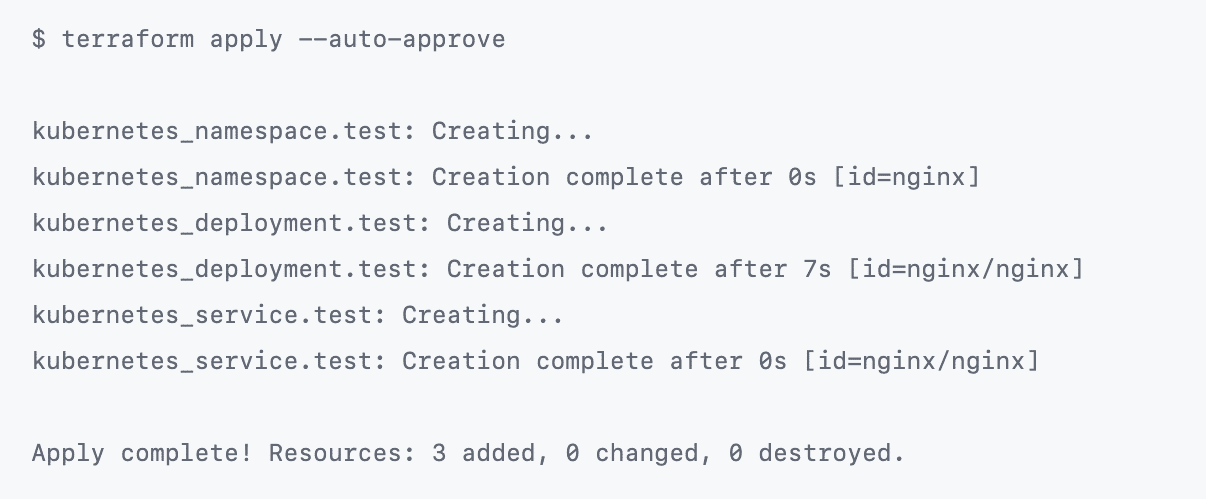
At the end of the plan, the CLI awaits your input to turn the plan into an actual cluster. For that, you can run the ‘$terraform apply’ command (see image above) to execute the generated plan contained in the .tf files in your storage.
Conclusion
As you may have noticed in the recent K8s resources provision process, AWS CLI was used to run commands against the instance. This is also possible to achieve using the Terraform CLI entirely. You’d need to configure Terraform to access your instance. The kubectl inclusion above only serves to confirm your cluster’s existence once the plan materializes successfully.
The process you’ve been guided through has several advantages over using a raw K8s CLI to provision resources. To start with, Terraform offers a pre-check service that compares your planned environment setup with the resources or current state of the entire infrastructure. This way, you can recognize the “drift” before it’s too late and you need to deconstruct or roll back settings. Terraform aptly named this level of service “Plan.”
While Kubernetes provisions resources, it also expects you to run a series of kubectl commands when you need to alter the slightest of variable arguments. On the other hand, Terraform CLI tools give you a root-tree map view of all states that you can create, patch, or even tear down with the use of a single command. Effectively, this gives you better access and control over the full lifecycle of your infrastructure than stock K8s does.
Lastly, the configuration .tf file you run with Terraform to build infrastructure renders a virtual dependency chart for easier management of contained states and variables. This way, certain command flags can be skipped on the basis of the availability of required resources in what’s effectively a pre-check.
Notice how the final repository’s cluster creation file included tags. While they allow you resource tracking capability, tags leave out the ability to forecast the costs each of the provisioned resources will incur.
Manage, track, and report your AWS spending in seconds — not hours
CloudForecast’s focused daily AWS cost monitoring reports to help busy engineering teams understand their AWS costs, rapidly respond to any overspends, and promote opportunities to save costs.
Monitor & Manage AWS Cost in Seconds — Not Hours
CloudForecast makes the tedious work of AWS cost monitoring less tedious.
More from CloudForecast


AWS cost management is easy with CloudForecast
We would love to learn more about the problems you are facing around AWS cost. Connect with us directly and we’ll schedule a time to chat!
