What is Jira?
Jira is a popular project management and issue-tracking tool built by Atlassian. Teams use Jira to plan, track, and manage work—from software development tasks to operational requests. It provides workflows, dashboards, and reporting to keep projects organized and ensure accountability across teams.
What Does the CloudForecast + Jira Integration Do?
The integration helps turn cloud cost insights into actionable tasks inside Jira. With just a few clicks, you can:
- Create Jira issues directly from Cost Group Reports when unexpected cost increases occur.
- Generate Jira issues from ZeroWaste findings to flag idle or underutilized resources.
- Automatically include details, deep links back to CloudForecast, and exact resource IDs so engineers can take action quickly.
- Configure project, issue type, and assignee via OAuth for seamless setup.
In short, CloudForecast + Jira ensures cloud cost anomalies and waste don’t just get noticed—they get tracked, assigned, and resolved in the tools your team already uses.
Requirements:
- Active CloudForecast Account
- Active Jira Account
Setup Jira Integration in CloudForecast
1. Overview of Options
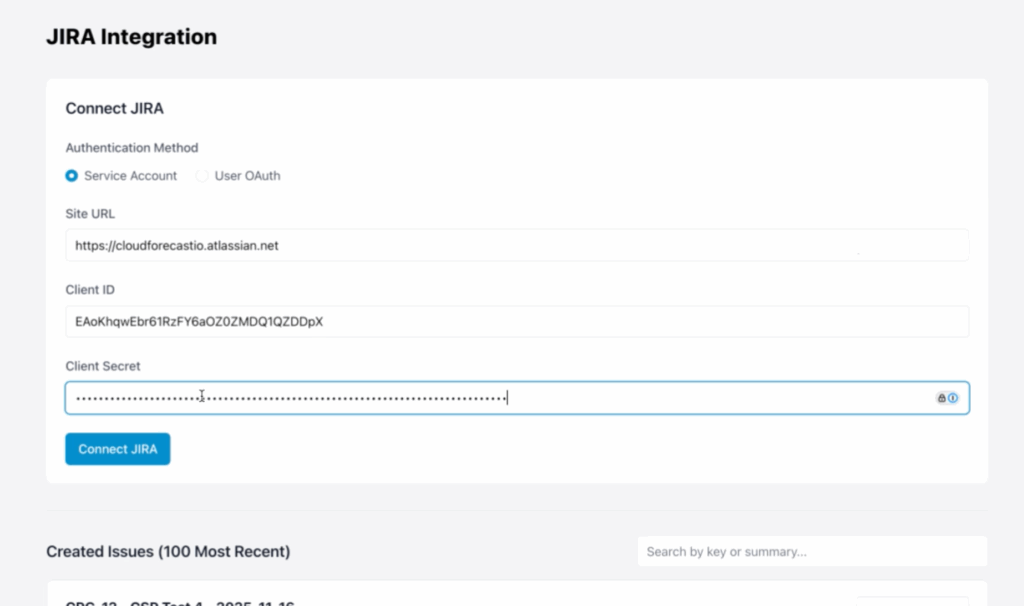
- There are two options for setting up the Jira Integration: Service Account and User OAuth.
- Service Account is the preferred method of setting up our permissions with Jira, as it’s not tied to a user like OAuth.
- Navigate to Integration > JIRA in CloudForecast to get started with the process.
2. Requirements for Service Account Setup
- You need the following from JIRA for us to connect to JIRA via the Service Account method:
- A site URL
- A client ID.
- A client secret.
3. Grab the Site URL from JIRA
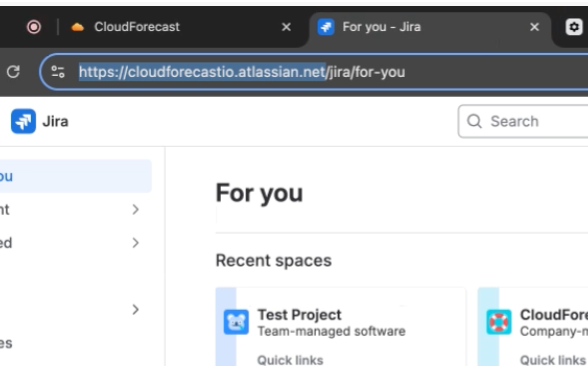
- This is the URL that is displayed in your web browser.
- Copy and paste this into CloudForecast:
4. Creating Client ID and Client Secret in Jira
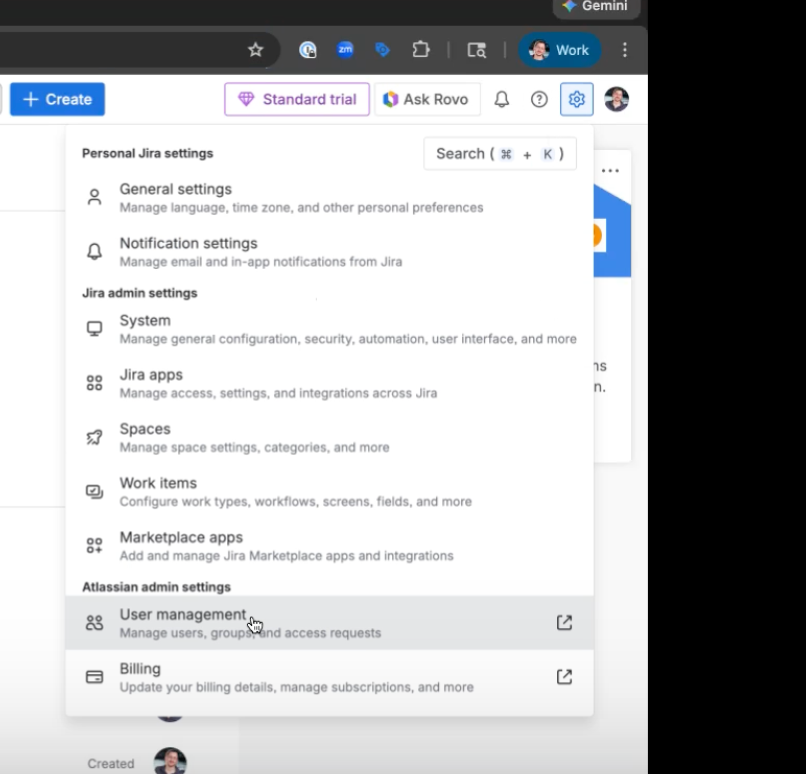
- Click the gear button on the top right of JIRA and navigate to User Management
5. Create a service account
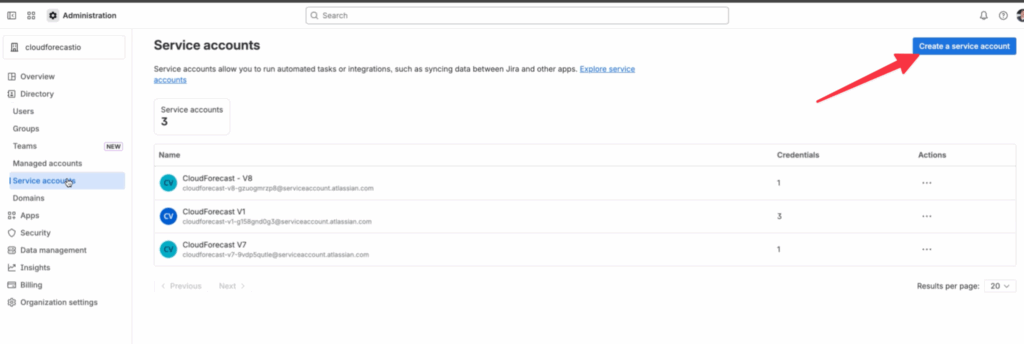
- Click Service accounts on the left hand menu.
- Press Create a new service account.
- Name the new service account CloudForecast and provide an optional description of what it is for, so you can reference it later.
6. Setting the app role for Service Account
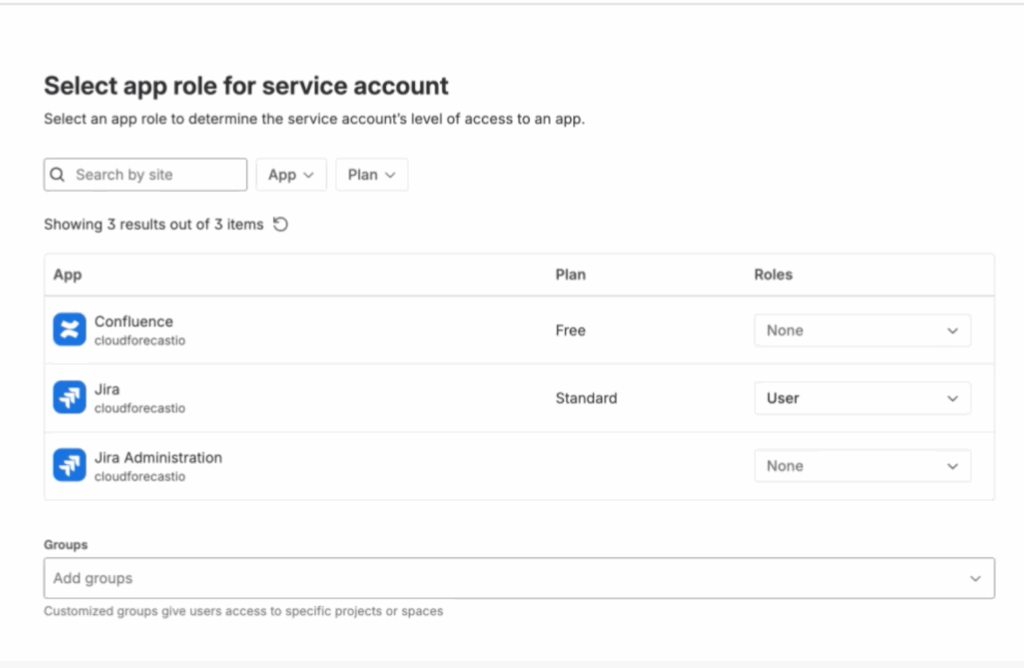
- Under the Jira row, change the Roles to User and press Create
7. Create Credentials
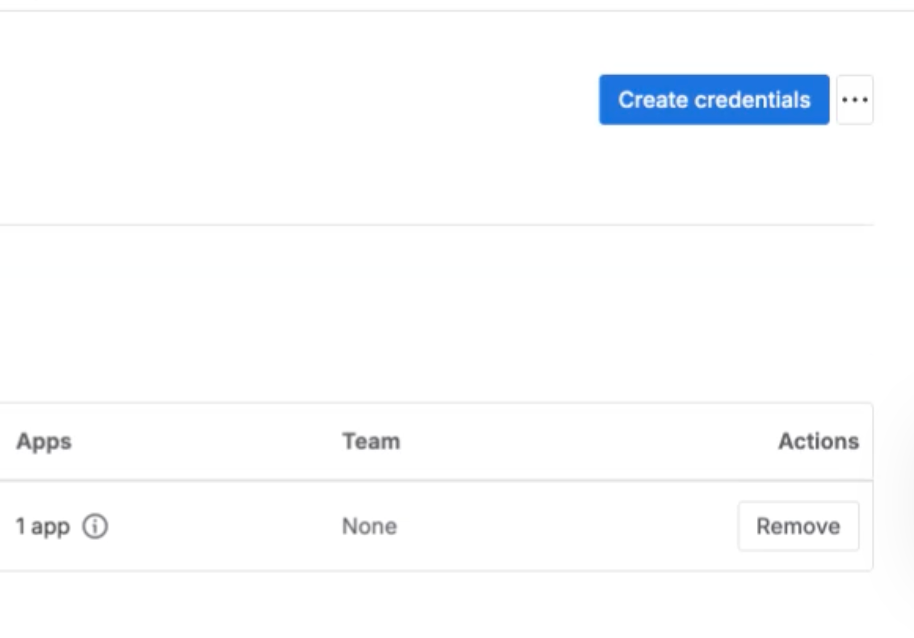
- Confirm the selection on the next page, and press the Create credentials button.
8. Select Authentication Type
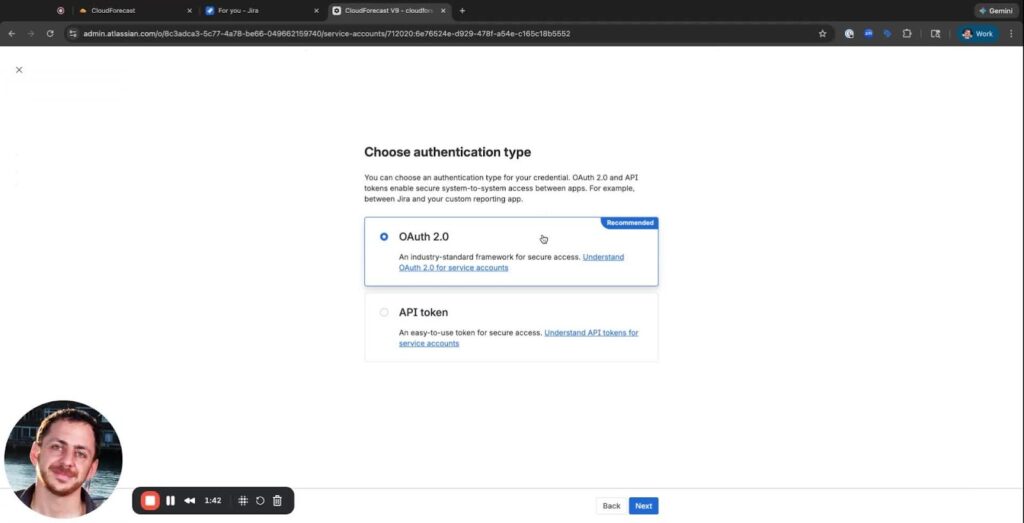
- Under Authentican type, select OAuth 2.0 and press Next.
- Name it CloudForecast_oauth so this can be easily referenced back and press Next.
10. Select the 19 scopes required by CloudForecast
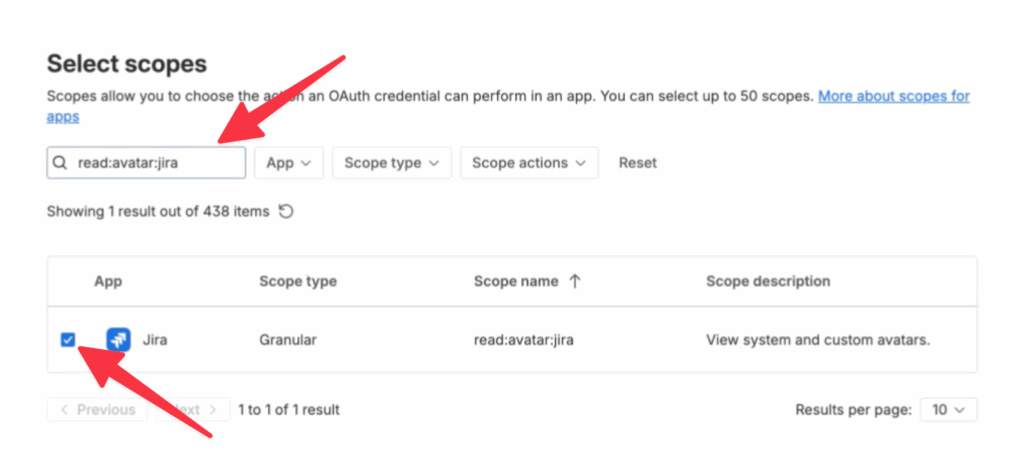
- Search and add the required scopes listed below one by one – there should be 19 total to select
- Ensure to check each scope carefully, as mistakes can lead to access issues if not all of them are selected:
read:application-role:jira
read:avatar:jira
read:field:jira
read:field-configuration:jira
read:group:jira
read:issue:jira
read:issue-meta:jira
read:issue-type:jira
read:issue-type-hierarchy:jira
read:project:jira
read:project-category:jira
read:project-version:jira
read:project.component:jira
read:project.property:jira
read:user:jira
write:attachment:jira
write:comment:jira
write:comment.property:jira
write:issue:jira
11. Finalizing and Confirming Scopes
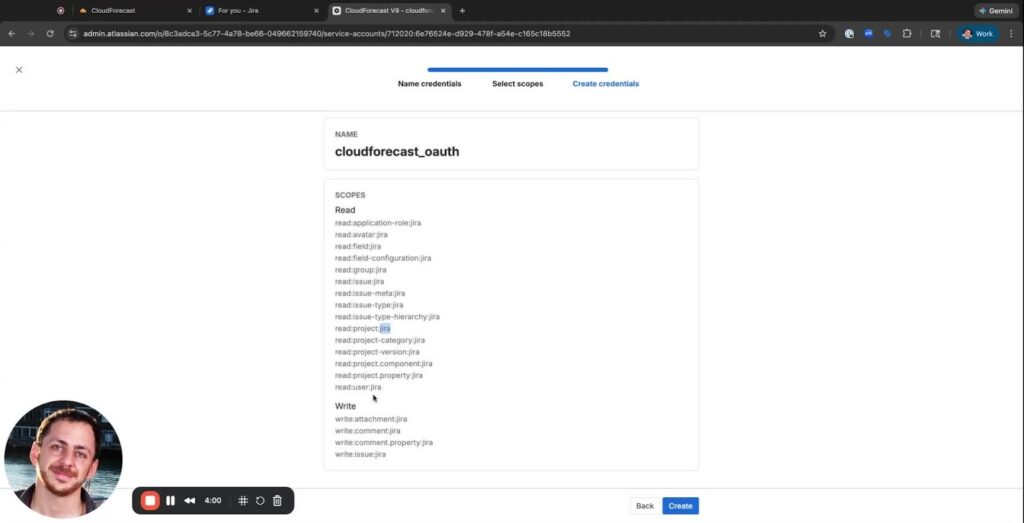
- After selecting the 19 scopes, press next for a confirmation page.
- Please make sure all the scopes match the list provided before you press create.
- DOUBLE AND TRIPLE CHECK THIS! If the page is left without saving, access to the configurations will be lost.
12. Copy and Paste ClientID and Client Secret
- After pressing create, you’ll be provided with a ClientID and ClientSecret, which can be copied and pasted into CloudForecast.
- IMPORTANT NOTE: If you leave or exit the page before copying ClientID and Secret or make a mistake on the scopes, you won’t be able to get it back, and you will need to start again from the beginning
- Press Connect JIRA in CloudForecast
Permissions
When connecting CloudForecast to Jira via OAuth, we only request the minimum permissions needed to create issues from CloudForecast reports.
What CloudForecast Can Do
✅ Read Projects
Used to display the list of Jira projects you can choose from when creating an issue.
✅ Read Issue Types
Allows us to show available issue types (Task, Bug, Story, Epic, etc.) for each project.
✅ Read Users / Assignees
Enables assigning created issues to the correct team members.
✅ Read Issues (required by Atlassian to create issues)
This is included automatically with the Create Issue permission. CloudForecast only reads what’s necessary to prefill fields and validate issue creation—nothing more.
✅ Create Issues
Allows CloudForecast to generate Jira issues that include:
– Cost insights
– Resource IDs
– Deep links back to CloudForecast
– Any additional metadata your team chooses to pass through
What CloudForecast Cannot Do
❌ Cannot delete issues
We don’t have any permissions to remove or trash Jira issues.
❌ Cannot edit existing issues
No ability to modify fields, change statuses, update comments, or adjust anything on issues your team already created.
❌ Cannot transition issues or update workflows
We can’t move issues across workflow stages or trigger workflow rules.
❌ Cannot manage project settings
No access to configurations, schemes, workflows, or any administrative settings.
❌ No global admin permissions
CloudForecast does not have organization-wide Jira access, admin rights, or visibility into anything outside the minimal scopes required to create issues.