ZeroWaste Permission Setup
ZeroWaste is CloudForecast’s cost optimization report designed to help you uncover waste across your AWS environment. Delivered as a weekly “health check,” it surfaces actionable insights and clear opportunities to reduce costs with minimal effort.
When paired with Cost Groups, you can slice and dice results for showback and distribute accountability directly to the engineers responsible for those resources. With our JIRA integration, you can also reconcile waste findings by seamlessly assigning remediation tasks to engineering teams.
Alongside CloudForecast’s own optimization policies, ZeroWaste integrates with AWS Cost Optimization Hub Data Export, providing enhanced coverage and ensuring alignment with AWS-recommended best practices.
There are two steps to set up #ZeroWaste and grant us the correct permissions:
- Master / Simple Account setup via CloudFormation Template – This will enable ZeroWaste permissions for one master payer account.
- Sub-account setup with CloudFormation Stackset – This will enable ZeroWaste permissions for all your sub-accounts, not including your master payer account.
You only need to complete step 1 if you only want to apply the permissions to the root / payer account. However, if you have sub-accounts under the payer account, you’ll want to complete both steps.
To get started with ZeroWaste permission setup, navigate to “Sources” > click “ZeroWaste” > Credentials, and you’ll be navigated to the credential and status page. You can also go directly to this link if you
From there, click See IAM Configuration Steps to expand all the instructions and reveal the direct link to launch CloudFormation stacks.
To see the full permissions being granted, you can view them here: ZeroWaste CloudFormation Template
CloudForecast Policy | Permissions on Root / Payer Account
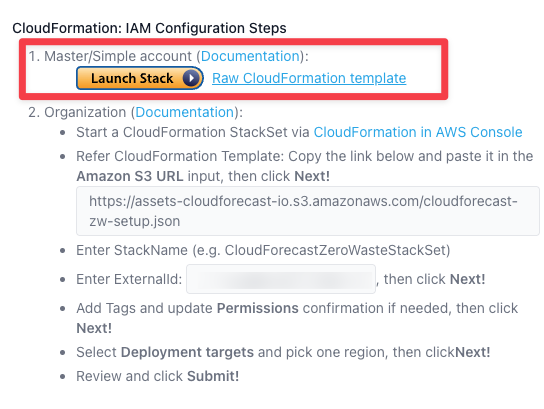
1. Click the See IAM Configuration Steps link to open up the setup modal.

2. Click Launch Stack
3. If prompted login with your AWS root / payer account.
4. Confirm RoleName in the CloudFormation stack matches with what’s in CloudForecast and Check off I acknowledge that AWS CloudFormation might create IAM resources with custom names.
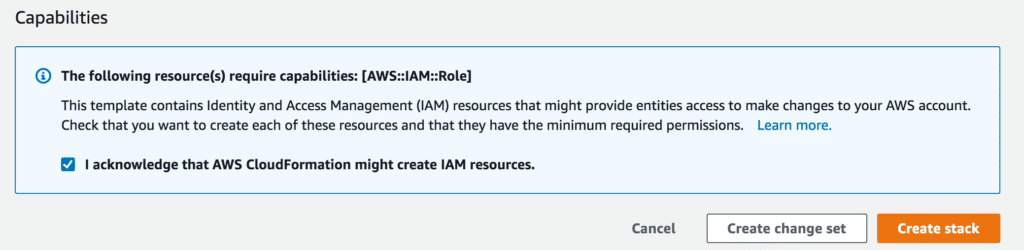
5. Press Create Stack
6. Wait a few minutes until Create_Complete is shown. You can press the refresh button to update status.
7. Navigate back to CloudForecast and look under the status column to confirm setup with the row. There should be a green checkmark in the row this was setup for.
Important notes:
- If you have only one master payer account/no sub-accounts, and/or if you would like to set this up for just your master payer account, the setup is complete.
- Continue on if you would like to set this up for all your sub-accounts. The following setup process uses CloudFormation StackSet to apply permissions across all your sub-accounts.
Sub-account setup with CloudFormation StackSet
1. Login to AWS Console – Navigate to CloudFormation in your AWS console: Direct Link to AWS CloudFormation
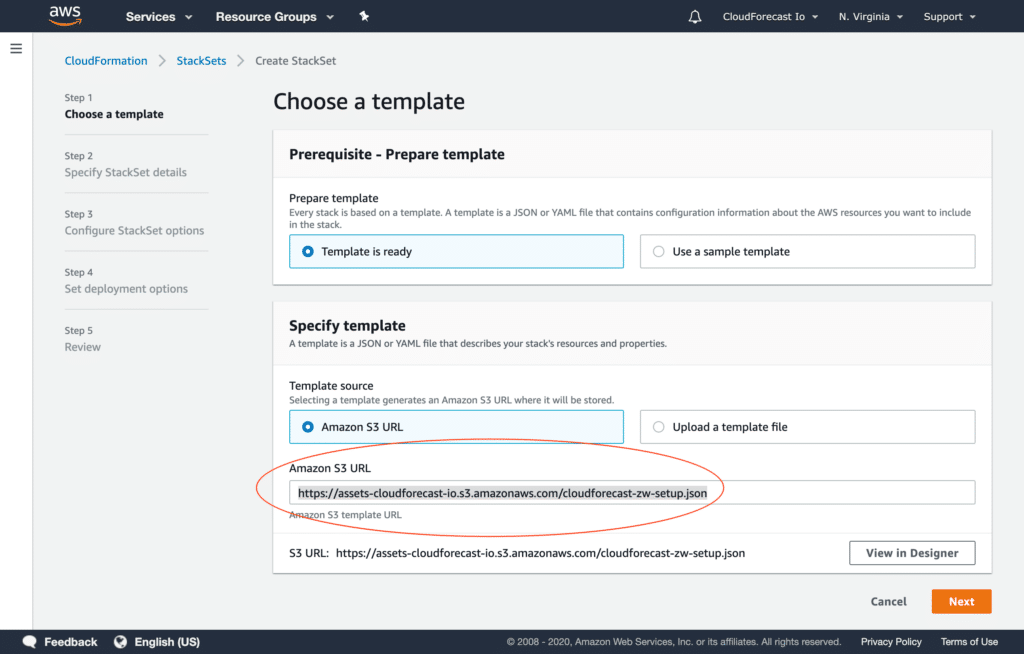
2. Choose a Template – Paste in the following under Amazon S3 URL: https://assets-cloudforecast-io.s3.amazonaws.com/cloudforecast-zw-setup.json. Press Next to confirm.
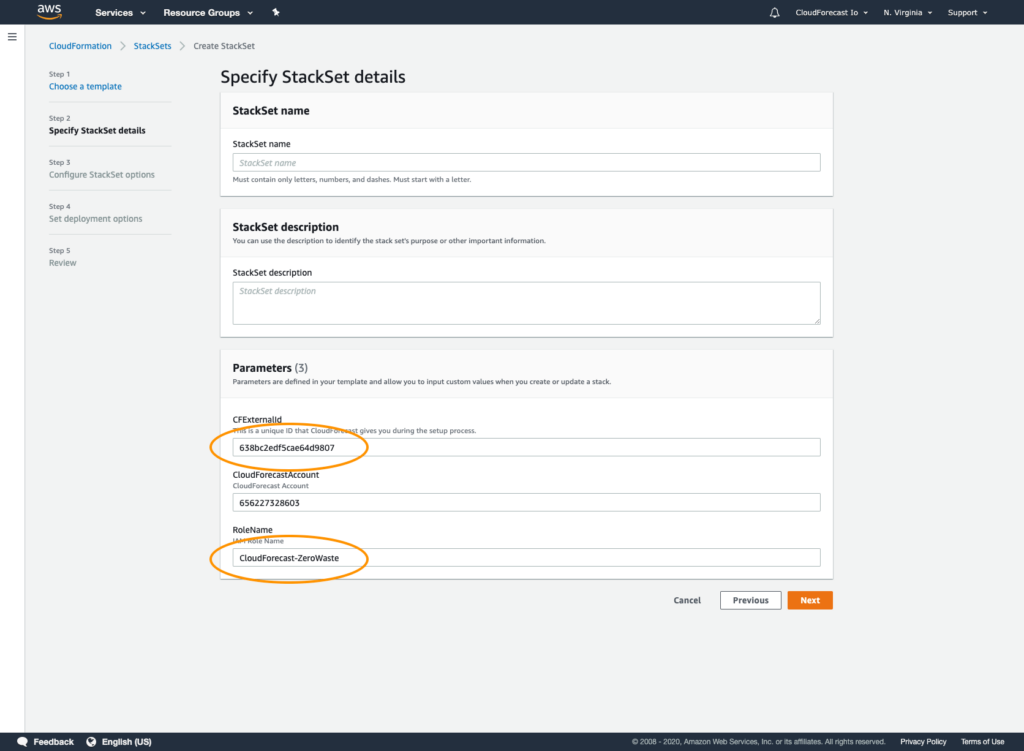
3. Specify StackSet details – Enter in a StackName and Description. Navigate back to the CloudForecast app and copy the ExternalID provided under IAM Configuration Steps and paste it in the ExternalID field in the AWS console. This ID is unique to your account. In addition, confirm RoleName matches with what’s in CloudForecast. Press next to confirm.
4. Configure StackSet options – Add Tags and update Permissions confirmation if needed, then click Next!
5. Set deployment options – Confirm that Deploy to Organization is selected and select the region of your choice.
6. Review – Review your settings and confirm sure RoleName matches with the RoleName in the CloudForecast app. Check off I acknowledge that AWS CloudFormation might create IAM resources with custom names and press submit.
7. Wait a few minutes until Create_Complete is shown. Since this is being deployed across all your sub-accounts, it can take a few minutes for this to be completed. You can also press the refresh button to update status.
8. Navigate back to CloudForecast and look under the status column to ensure confirmation of setup with thw row.